In Pendrive Windows

How To Copy Larger than 4GB file to a Capable Pendrive


Have you ever faced the problem that you are trying to copy a single file larger than 4 GB to your pen drive but it cannot copy even if there is free space more than 4 GB. The error says that the file is too large for the destination file system as show below.

It happens mostly with pen drives with FAT32 File SystemThe reason behind this problem is limitation of pen drive's file system FAT32. FAT32 only supports less than 4 GB files.

To do it, pen drive shouldn't be FAT32. Instead we can make it NTFS. Windows drives are also NTFS. That is why a file larger than 4 GB can be stored on your hard drive. NTFS supports larger than files 4 GB. To convert in NTFS we must have to format pen drive with NTFS file system.

Before beginning, move your important data to your computer because all data will be lost as we are formatting the pen drive. 

Formatting pen drive with NTFS will not affect the performance or anything of pen drive. Note that you can always re-format it with FAT32 in similar way once you have done your transfer of file. Follow the steps to format your pen drive with NTFS.

Steps:
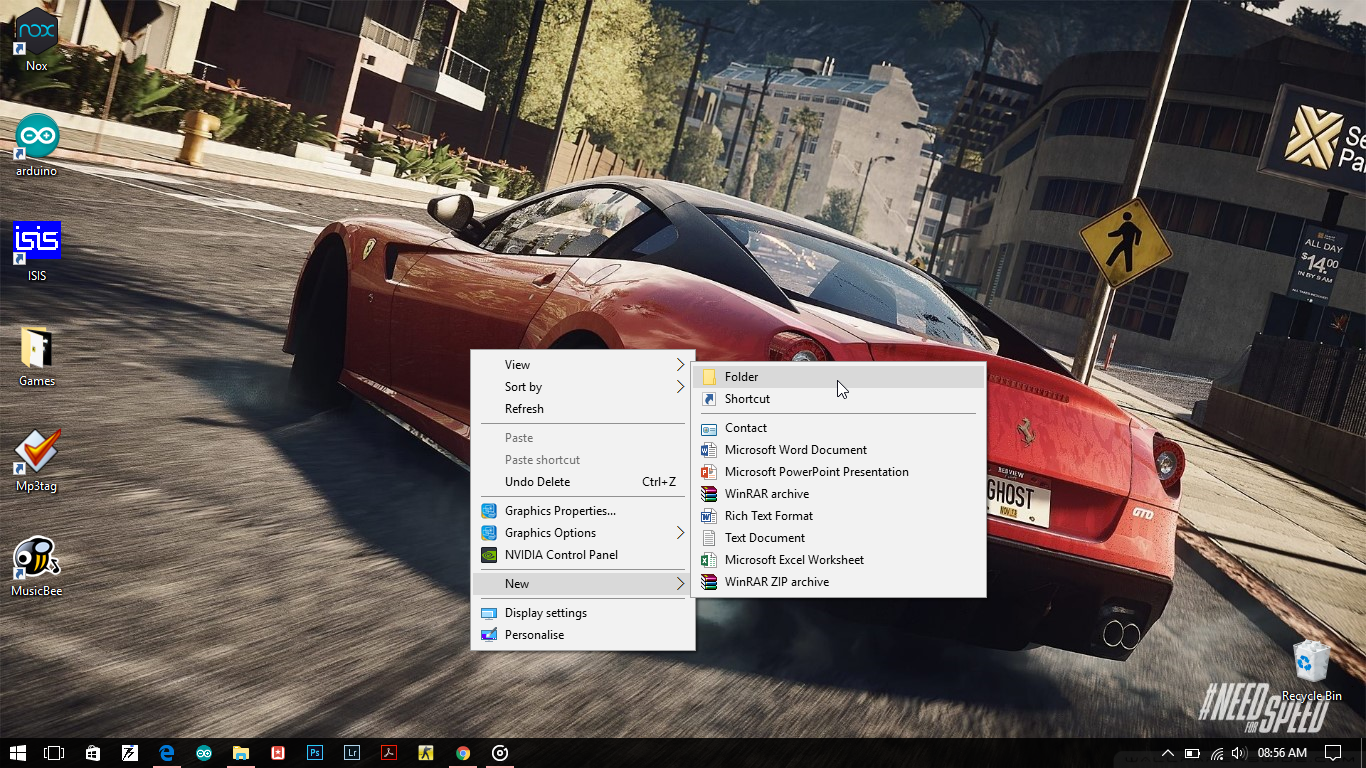
  • Go to My Computer/This PC and Right click on your pen drive. Select "Format" option.
  • In the Format Menu, click on "Restore device defaults".
  • Now, Select File System with NTFS option.


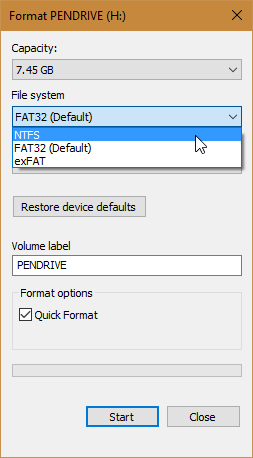
  • Click on Start button to format. Now your pen drive is in NTFS file system. You can copy larger the 4 GB files to your pen drive now.


  • To re-format it with FAT32,  Select FAT32 option under File System Menu.

Read More

Share Tweet Pin It +1

0 Comments

In Windows

How To Install Dolby Digital Audio On Windows 10,8.1,8,7 on any Laptop/PC


Everyone wants High quality audio for their laptops/PCs. But not all devices come with high quality audio like Dolby/Dolby Digital Plus Sound. Here, I am sharing a tutorial for people who want Dolby for their Laptops/PCs. There 4 versions of Dolby Audio Listed Below. You can use any one you want but i will prefer to Dolby Digital Plus Advance Audio for any random Laptop/PC as it gives best performance according to my experience and guide is also for that. To install Dolby, you must Disable Driver Signature Enforcement first. So lets start, Follow the steps given below.Windows 7 doesn't need to disable driver signature enforcement so you can skip those steps and continue with steps to install Dolby.

List:
  1. Dolby Digital Plus Advance Audio
  2. Dolby Digital Plus Home Theatre
  3. Dolby Advance Audio v2
  4. Dolby Home Theatre v4 

Downloads:
Download any one you want to install for your Laptop/PC.

Steps:
* To Disable Driver Signature Enforcement:
  • Hold Windows Key and press I key(Win+I).It will open Settings in windows 10,8.1 and 8.
  • Now, Go to Update & Security tab.
  • In Update & Security tab,go to Recovery and under Advanced Start-up option , click on Restart Now button.

  • Your PC/Laptop will be restarted and show a Advance startup Screen. Click on Troubleshoot tab.
  • Now, Click on Advanced Option tab.
  • Click on Startup Settings tab.
  • Now, Click on Restart button.
  • Now, Your PC/Laptop will restart again. While restarting, it will show Startup Setting shown below. Press key 7 to disable driver signature enforcement.(press the number key that has this option if your option is not on 7th number).

* Steps To Install Dolby:
  • Download your desired Dolby file from downloads section and extract it anywhere you want.
  • Your PC/Laptop will start with this settings. Now, Go to Start>Control Panel>Device Manager.


    • Double Click on "Sound, video and game Controllers" tab.
    • There will be your Sound drivers as per your system. In most of case, It will be "Realtek High Definition Audio". Right on your sound driver and select "Update driver software..." option.
    • A window will open and ask to select driver software shown below. Click on "Browse my computer for driver software" option.
    • In next window, Click on "Let me pick from a list of device drivers on my computer" option.


    • In next Window, Click on "Have disk..." button located on right lower side of window.
    • In next window, Select "Browse" button on right lower corner.
    • Go to extracted folder of the file you have downloaded.Go to 32 bit/64 bit>Drivers and click on Open button.(Select 32 bit/64 bit depending on your operating system.)
    • Now, click on Ok button.


    • Select Model from list that you want to install and click on Next button.


    • It will ask for a warning "Update driver warning".click on Yes button to continue.(For windows 7 users : there will be a popup of windows security after this step.Simply click on "Install this driver software anyway"option.)


    • Now, the driver software will be installed. It will take a few minutes to install. As installation completes, click on Close button.


    • Now, check your driver software in device manager. It is changed from "Realtek High Definition Audio" to Dolby.

    • Now, go to the folder that you have extracted. Go to 32 bit/64 bit>Setup. Double click on ".msi" file to run it.(Select 32 bit/64 bit depending on your operating system.)
    • Now, in the installation click Next.
    • Tick check box of "Create a shortcut for this program on the Start Menu" and click Next.
    • Click on Install button.
    • Wait for installation to complete.When installation is completed, right click on speaker icon on taskbar and select "Playback devices" from the menu.
    • In the new window of Sound, Double click on Speakers. It will open Speakers Properties.
    • Click on Dolby tab.
    • Click on Power button.
    • Click OK and you are done :)
    • Dolby is installed and activated. To open control panel of Dolby, go to Start>Dolby>Dolby Digital Plus.
    • You can set settings as per your requirement for different categories given in control panel. You can also set 2 Custom settings as your choice.If you are facing any problem following the steps given then feel free to ask. Enjoy Dolby :)
    Video Guide for Installation:


      Read More

      Share Tweet Pin It +1

      43 Comments

      In Windows

      How To Save Windows Spotlight Lockscreen Wallpapers And Use As Wallpaper


      Windows 10 has a unique feature called "Windows Spotlight". It shows a group of pre selected photos by Microsoft on lockscreen. You can save them for later use including on your phone,laptops and PCs. Spotlight images are cached on your local PC and hidden in a particular folder. To save them to use as wallpaper, just follow the simple steps given below.


      Steps:

      • Hold Windows Key and press R key(Win+R). It will open Run Dialog Prompt.


      • Now, Enter the following command without quotes and hit Enter. It will open a  folder where all spotlight files is stored as cache.

      "%localappdata%\Packages\Microsoft.Windows.ContentDeliveryManager_cw5n1h2txyewy\LocalState\Assets"


      • Now, Copy and Paste all files to your desired folder.
      • You need to give JPG Extension to all files. To do that follow steps below. 
      • Hold Shift key and Right click on the blank space of folder. Select "Open command prompt here" option. It will open a command prompt in the current directory.
      • Type this command without quotes and hit Enter.
      "Ren *.* *.jpg"

      • Now, all files are converted to ".jpg" format. There will be some junk files along with wallpapers those aren't images at all.

      • Delete them. Remaining files are your spotlight wallpapers cached on your laptop/PC. 

      • There will be some portrait images also. You can use them as your smartphone's lockscreen wallpaper.
      • Quantity of images depend on how many Spotlight images were produced/cached on your PC. You can re-run this tutorial every couple of weeks for new images.


      Read More

      Share Tweet Pin It +1

      1 Comments

      In Windows

      How To Activate Windows Built In Administrator Account


      There is a hidden administrator account in windows 10,8.1,8. It is inactive by default and needs to be enabled before it can be used. 

      To use this hidden administrator account, follow the steps given below.

      Steps:

      • Click on Start button and type "cmd" without quotes.
      • Hit Enter and wait for results to display.
      • Right click on "Command Prompt" result and click on "Run as administrator" option.

      • It will open a command prompt with administrator rights. Now write the following command without quotes and hit Enter to active administrator account. It will show the message "The command completed successfully."
      "net user administrator /active:yes"

      • Now,check for administrator named account. It will be activated.
      • Once account is activated, you can log in and change the password if you want.
      • To deactivate or make it hidden again, enter the following command without quotes and hit Enter.
      "net user administrator /active:no"


      • It is advisable to keep the administrator account active and protect it with password. It can be useful in case of you lost control of your account.


      Read More

      Share Tweet Pin It +1

      1 Comments

      In Windows

      GUIDs for creating setting shortcuts in windows


      GUIDs are used to create shortcuts available in settings by creating folders with GUID.

      Steps for Creating folder shortcuts using GUID:

      • Create a new folder.
      • rename it with following(without quotes):
      "folder name.GUID"
      Here type your desired name by replacing "folder name" and replace GUID with GUID of the setting shortcut that you want to create.
      Example: To create God Mode Folder Shortcut.
      • folder name : God Mode
      • GUID : {ED7BA470-8E54-465E-825C-99712043E01C}
      Rename folder with following name(Without quotes):
      "GodMode.{ED7BA470-8E54-465E-825C-99712043E01C}"


      GUIDs for Some Settings:

      Administrative Tools:
      • GUID : {D20EA4E1-3957-11d2-A40B-0C5020524153}
      • Supported OS: Windows Vista,Windows 7,Windows 8,Windows 8.1
      Autoplay:
      • GUID : {9C60DE1E-E5FC-40f4-A487-460851A8D915}
      • Supported OS: Windows Vista,Windows 7,Windows 8,Windows 8.1
      Biometric Devices:
      • GUID : {0142e4d0-fb7a-11dc-ba4a-000ffe7ab428}
      • Supported OS: Windows 7,Windows 8,Windows 8.1
      BitLocker Drive Encryption:
      • GUID : {D9EF8727-CAC2-4e60-809E-86F80A666C91}
      • Supported OS: Windows Vista,Windows 7,Windows 8,Windows 8.1
      Color Management:
      • GUID : {B2C761C6-29BC-4f19-9251-E6195265BAF1}
      • Supported OS: Windows Vista,Windows 7,Windows 8,Windows 8.1
      Windows Firewall:
      • GUID : {4026492F-2F69-46B8-B9BF-5654FC07E423}
      • Supported OS: Windows Vista,Windows 7,Windows 8,Windows 8.1
      For more GUIDs go to following link:

      Read More

      Share Tweet Pin It +1

      0 Comments

      In Windows

      How to Create God Mode of Control Panel in Windows


      The Windows Master Control Panel is called as God Mode. It puts hundreds of settings from all around the operating system all in one place. God Mode doesn't add functionality. But it helps users work more efficiently by collecting all these tweaks and controls in one place. It can be created by using GUID of that particular setting.God Mode is shown in below picture.

      As you can see, there are 228 settings all in one place. To create God Mode follow the steps.
      GUID{ED7BA470-8E54-465E-825C-99712043E01C}


      Steps:
      • Right click on desktop.
      • Select New>Folder.
      • Give the following name to the Folder.(Without Quotes)
      "GodMode.{ED7BA470-8E54-465E-825C-99712043E01C}"

      • Hit Enter.
      • The icon of folder will be changed to control panel icon. God Mode is created.Double click on it to open.You can move this shortcut anywhere you want.

      Note:
      God Mode is the name of this folder used by bloggers. You can give any name to that folder following by .GUID:

      "Your Folder Name Here.{ED7BA470-8E54-465E-825C-99712043E01C}"

      Read More

      Share Tweet Pin It +1

      0 Comments

      Instagram

      Pages

      Flickr Images

      Like us on Facebook

      Popular Posts