In Gmail

How To Track Your Mail sent by Gmail


We all are using Gmail mostly to mail someone. Suppose that you are sending an important mail to someone and you want to know whether he/she has seen it or not. Gmail hasn't that kind of feature like whatsapp and other chat messanger in which you can see the status of message like "send,received,seen".

With an extension, you can actually track your mail whether it has been seen or not. this extension provides some free features in basic version and has also a premium version. It almost provides tracking correctly 99%. Some mails cannot be tracked by this but its possibility is only 1%.

The is an chrome extension forGmail named "Mail Track For Gmail" for web store. Link for that extension is given below. 


Download From Here


Steps:
  • Go to the link given above and install the extension.
    • After installation. Open Gmail website or refresh it if it is already opened. It will ask to Active Mailtrack. Click on activate mailtrack. and it will redirect to sign in option. just sign in with your google account and allow permissions.
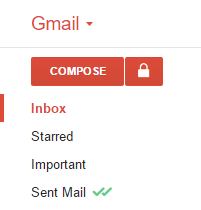
    • Now, refresh Gmail. There will an icon of mailtrack that shows that the service is enabled.


    • Now, all the mails you send can be tracked and you will know if your mail is read by receiver or not. When you will write a new mail, there will be a signature of mailtrack in mail like shown below.

    • Whenever your mail is read by receiver, you will see a double green tick mark just like whatsapp.


    Read More

    Share Tweet Pin It +1

    0 Comments

    In Gmail

    How to send Password Protected mail using Gmail


    We all use mail various services today very frequently. Gmail is famous among all. We share information related business, education, entertainment, private info, etc. The point is to provide security. If you have sent a mail containing some private stuff to someone and you want that the other person only can see that stuff. What if someone is spoofing on the other person or is reading your mails!!

    Well, to solve that issue, there is a way to encrypt the mail you are sending with a password!! You can encrypt the mail with password and then send it. Now it requires the password you set to decrypt the mail text at receiver side. So no other than the person that you want to send cannot read your mail. 

    To do that, There is an chrome extension for gamil named "Secure Mail for Gmail" for web store. You and receiver both must have to install the extension in order to encrypt and decrypt the mail. Link for that extension is given below. 


    Download From Here


    Steps:
    • Go to the link given above and install the extension.
    • After installation. Open Gmail website or refresh it if it is already opened. It will show a Locked/Secure button at the right side of the compose button.


    • Click on that button to write an encrypted mail.


    • Write your mail and click on Send Encrypted button after finishing your mail. Now, it will ask for a password to encrypt the mail.
    • Click on Encrypt $ Send button to send. Now, your mail has been sent in encrypted form. No one can read it without password.(Receiver must need to install the same extension in order to decrypt the mail. If receiver have not the extension than a link to install that extension will be sent along with the mail you have sent. so don't worry about that :) )
    • Click on received mail to decrypt it. It will ask for the password to decrypt it.


      Read More

      Share Tweet Pin It +1

      0 Comments

      In Windows

      How To Create Shutdown, Restart, Log Off, Suspend and More Shortcuts on Windows Desktop


      We all use shortcuts today to do our tasks quickly. Generally to Shutdown/Log off/Hibernate/Restart, we use Start menu to access these option or we use keyboard shortcut Alt+F4 to open menu for these options. 

      The other way is to create shortcuts of these options on desktop or wherever you want so you can use them by just double clicking on it!! You can also assign an icon to them.

      Here i will show you how to create a shortcut of these options and how to change their icons. I am taking example of shutdown.

      Steps:
      • Right click on desktop and go to New>>Shortcut.
      • In the Create Shortcut Setup Wizard, copy the code given below(without quotes) in the box. (Here "00" is timer in seconds as time system will shutdown after the given time. you can change if you want)
      "Shutdown -s -t 00"
      • Click Next. In next wizard, Give a name to shortcut whatever you want. I am giving name Shortcut as its shortcut for shutdown.
      • Click on Finish. Your shortcut is created. Now, you can set a icon to it.
      • To set icon, right click on that shortcut and go to properties. In properties wizard, go to change icon and select a icon for your shortcut and click OK.
      Other Codes : 
      Copy it without quotes
      • Restart :  "Shutdown -r -t 00"
      • Log Off : "Shutdown.exe -L"
      • Hibernate/Suspend : "rundll32.exe PowrProf.dll, SetSuspendState"
      • Lock : "rundll32.exe user32.dll LockWorkStation
      • Enable Firewall : "netsh.exe firewall set opmode enable"
      • Disable Firewall : "netsh.exe firewall set opmode disable"


      Read More

      Share Tweet Pin It +1

      0 Comments

      In Internet Windows

      How To Download Any Website Offline


      We uses many websites to get information today. Some websites we visit frequently and some we don't. We all have some websites that we use often in a day. You need internet to open any website every time. Its very boring to access your website in slow internet. But what if you need information from your website and there in no network connectivity?

      What if you can access your website offline!! Yes, it is possible with a software called HTTrack. HTTrack is website copier that we can copy website for you to use it offline.

      HTTrack is a free and easy-to-use offline browser utility.It allows you to download a World Wide Web site from the Internet to a local directory, building recursively all directories, getting HTML, images, and other files from the server to your computer. HTTrack arranges the original site's relative link-structure.

      Simply open a page of the "mirrored" website in your browser, and you can browse the site from link to link, as if you were viewing it online. HTTrack can also update an existing mirrored site, and resume interrupted downloads. HTTrack is fully configurable, and has an integrated help system.

      Download it from here : HTTrack Website Copier

      Steps:

      • Open HTTrack application after installation.
      • Click on Next.
      • Give Project Name you want. It is preferable to give website's name to identify it when downloaded.Click Next.


      • It will ask for website address. Enter the URL of the website you want to download offline.


      • Click Next and then Click Finish. It will start downloading your website.


      • It will take time depending on your website how big is. Once it is downloaded you can access it offline. To open your website, go to C://My Web Sites//<Project Name>. Here, <project name> is the folder with the project name you had given while downloading.
      • You will find a HTML file named "index.html". You can access your website from this file. Double click on it to open your website.


      Read More

      Share Tweet Pin It +1

      0 Comments

      In Pendrive Windows

      How To Copy Larger than 4GB file to a Capable Pendrive


      Have you ever faced the problem that you are trying to copy a single file larger than 4 GB to your pen drive but it cannot copy even if there is free space more than 4 GB. The error says that the file is too large for the destination file system as show below.

      It happens mostly with pen drives with FAT32 File SystemThe reason behind this problem is limitation of pen drive's file system FAT32. FAT32 only supports less than 4 GB files.

      To do it, pen drive shouldn't be FAT32. Instead we can make it NTFS. Windows drives are also NTFS. That is why a file larger than 4 GB can be stored on your hard drive. NTFS supports larger than files 4 GB. To convert in NTFS we must have to format pen drive with NTFS file system.

      Before beginning, move your important data to your computer because all data will be lost as we are formatting the pen drive. 

      Formatting pen drive with NTFS will not affect the performance or anything of pen drive. Note that you can always re-format it with FAT32 in similar way once you have done your transfer of file. Follow the steps to format your pen drive with NTFS.

      Steps:
      • Go to My Computer/This PC and Right click on your pen drive. Select "Format" option.
      • In the Format Menu, click on "Restore device defaults".
      • Now, Select File System with NTFS option.


      • Click on Start button to format. Now your pen drive is in NTFS file system. You can copy larger the 4 GB files to your pen drive now.


      • To re-format it with FAT32,  Select FAT32 option under File System Menu.

      Read More

      Share Tweet Pin It +1

      0 Comments

      In Windows

      How To Install Dolby Digital Audio On Windows 10,8.1,8,7 on any Laptop/PC


      Everyone wants High quality audio for their laptops/PCs. But not all devices come with high quality audio like Dolby/Dolby Digital Plus Sound. Here, I am sharing a tutorial for people who want Dolby for their Laptops/PCs. There 4 versions of Dolby Audio Listed Below. You can use any one you want but i will prefer to Dolby Digital Plus Advance Audio for any random Laptop/PC as it gives best performance according to my experience and guide is also for that. To install Dolby, you must Disable Driver Signature Enforcement first. So lets start, Follow the steps given below.Windows 7 doesn't need to disable driver signature enforcement so you can skip those steps and continue with steps to install Dolby.

      List:
      1. Dolby Digital Plus Advance Audio
      2. Dolby Digital Plus Home Theatre
      3. Dolby Advance Audio v2
      4. Dolby Home Theatre v4 

      Downloads:
      Download any one you want to install for your Laptop/PC.

      Steps:
      * To Disable Driver Signature Enforcement:
      • Hold Windows Key and press I key(Win+I).It will open Settings in windows 10,8.1 and 8.
      • Now, Go to Update & Security tab.
      • In Update & Security tab,go to Recovery and under Advanced Start-up option , click on Restart Now button.

      • Your PC/Laptop will be restarted and show a Advance startup Screen. Click on Troubleshoot tab.
      • Now, Click on Advanced Option tab.
      • Click on Startup Settings tab.
      • Now, Click on Restart button.
      • Now, Your PC/Laptop will restart again. While restarting, it will show Startup Setting shown below. Press key 7 to disable driver signature enforcement.(press the number key that has this option if your option is not on 7th number).

      * Steps To Install Dolby:
      • Download your desired Dolby file from downloads section and extract it anywhere you want.
      • Your PC/Laptop will start with this settings. Now, Go to Start>Control Panel>Device Manager.


        • Double Click on "Sound, video and game Controllers" tab.
        • There will be your Sound drivers as per your system. In most of case, It will be "Realtek High Definition Audio". Right on your sound driver and select "Update driver software..." option.
        • A window will open and ask to select driver software shown below. Click on "Browse my computer for driver software" option.
        • In next window, Click on "Let me pick from a list of device drivers on my computer" option.


        • In next Window, Click on "Have disk..." button located on right lower side of window.
        • In next window, Select "Browse" button on right lower corner.
        • Go to extracted folder of the file you have downloaded.Go to 32 bit/64 bit>Drivers and click on Open button.(Select 32 bit/64 bit depending on your operating system.)
        • Now, click on Ok button.


        • Select Model from list that you want to install and click on Next button.


        • It will ask for a warning "Update driver warning".click on Yes button to continue.(For windows 7 users : there will be a popup of windows security after this step.Simply click on "Install this driver software anyway"option.)


        • Now, the driver software will be installed. It will take a few minutes to install. As installation completes, click on Close button.


        • Now, check your driver software in device manager. It is changed from "Realtek High Definition Audio" to Dolby.

        • Now, go to the folder that you have extracted. Go to 32 bit/64 bit>Setup. Double click on ".msi" file to run it.(Select 32 bit/64 bit depending on your operating system.)
        • Now, in the installation click Next.
        • Tick check box of "Create a shortcut for this program on the Start Menu" and click Next.
        • Click on Install button.
        • Wait for installation to complete.When installation is completed, right click on speaker icon on taskbar and select "Playback devices" from the menu.
        • In the new window of Sound, Double click on Speakers. It will open Speakers Properties.
        • Click on Dolby tab.
        • Click on Power button.
        • Click OK and you are done :)
        • Dolby is installed and activated. To open control panel of Dolby, go to Start>Dolby>Dolby Digital Plus.
        • You can set settings as per your requirement for different categories given in control panel. You can also set 2 Custom settings as your choice.If you are facing any problem following the steps given then feel free to ask. Enjoy Dolby :)
        Video Guide for Installation:


          Read More

          Share Tweet Pin It +1

          43 Comments

          Instagram

          Pages

          Flickr Images

          Like us on Facebook

          Popular Posts